
Installing wall panels: the right timing determines how tight they will still be in a few years
Wall panels can give a living room, bedroom or hallway a completely different look relatively quickly. But especially with MDF and solid wood, the final result is not only determined by how neatly the panels are mounted today.
Temperature, humidity, the condition of the wall, floor structure and electrics all play a role.
At MULTI Klussenbedrijf, we therefore look at the following before installation:
material → substrate → moisture → electrics → floor → measurements → final finish.
Let panels acclimatize first in the home
MDF and wood react to changes in humidity.
If panels are mounted directly from a cold storage room, they may shrink or expand later.
That's why the article recommends letting panels acclimatize for approximately 3–7 days in the room where they will eventually be placed, at approximately 15–20 °C and 40–60% relative humidity.
For MDF slats, 48–72 hours may sometimes be sufficient; solid wood prefers a bit more time.
Not directly on fresh plasterwork
A wall may appear dry on the surface while there is still a lot of construction moisture inside.
New plasterwork typically requires approximately 2–4 weeks drying time before MDF or wooden panels are installed. With thicker plaster layers or poor ventilation, this can take longer.
If panels are installed too early, residual moisture can be drawn into the material.
The result can later be:
bulging, gaps, loose connections or cracks in painted MDF frames.
Does a wall have existing moisture spots? Then the cause must first be resolved. Wall panels should not hide a moisture problem.
What is the best order during a renovation?
In most homes, this order works most logically:
1. adjust electrics and pipes
2. repair wall and plaster
3. allow to dry completely
4. lay new floor
5. install wall panels
6. skirting boards and trim strips
7. caulk and paint
This order also aligns with the technical recommendations in the article.
When the floor is already in place, the underside of the wall panels can be finished much more accurately.
Floating floor must be able to move
With laminate or floating PVC, the wall finish must not clamp the floor.
The article recommends approximately 8–10 mm clearance between panel and floor edge. This space can then be covered with a skirting board that is attached to the wall.
This seems like a small detail, but it prevents a floating floor from later bulging because it has nowhere else to expand.
Wall panels make the wall thicker
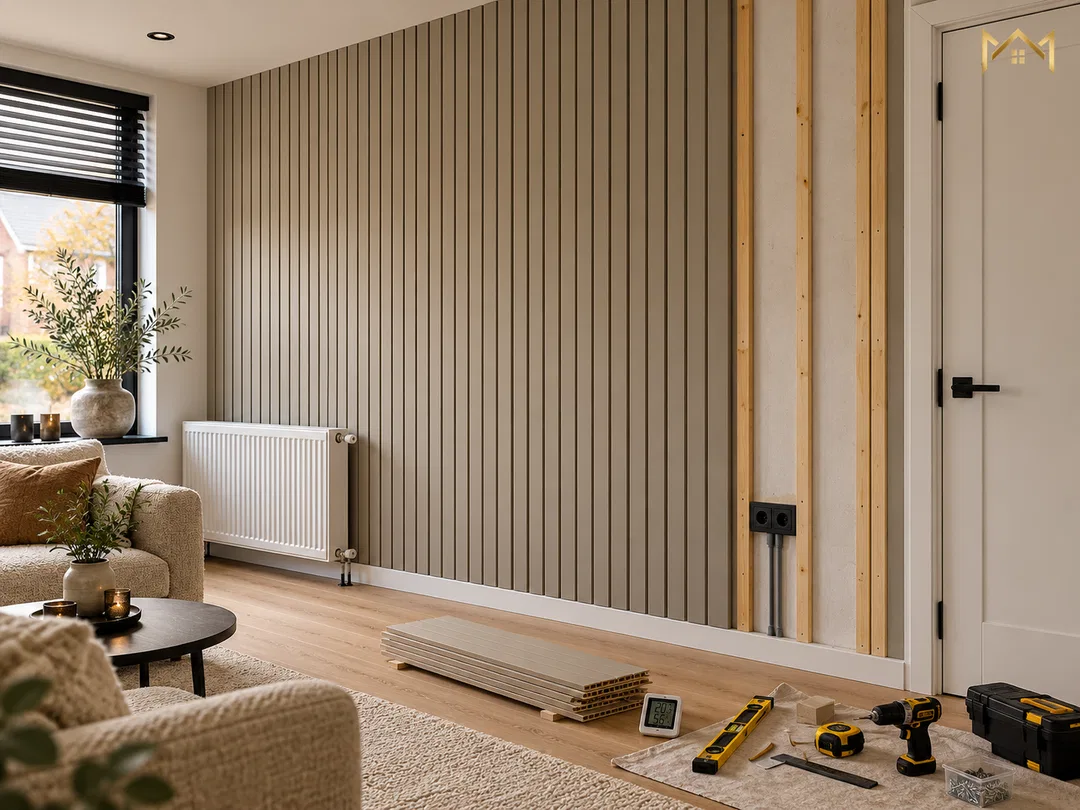
Panels mounted on battens can bring the wall forward approximately 2–5 cm.
This has consequences for more than just the wall itself.
Think for example of:
- outlets and switches;
- door frames;
- window sills;
- radiators;
- skirting boards;
- connections in inside corners.
Outlets, for example, must be moved forward so that they eventually sit flush in the new wall finish.
With an existing door frame, an additional trim strip may be needed to neatly connect the thicker wall.
An uneven wall? Then battens are better
Not every existing Dutch wall is completely flat.
When panels are glued directly to a wavy wall, the panel often simply follows that deformation.
In such a situation, battens can provide better control.
The article mentions, for example, strips of 22 × 45 or 27 × 45 mm, usually with approximately 40–60 cm center-to-center spacing. For a tight final result, a deviation of approximately 2 mm over 2 meters is mentioned as the target.
That preparatory work is not visible after completion, but it does determine how tight the wall ultimately looks.
Also determine outlet locations beforehand
A panel wall can look beautiful, but an outlet that ends up half behind a batten is difficult to solve afterwards.
That's why we determine before installation where:
outlets, switches, wall lights, TV connections and any cable pass-throughs
should be located.
With wall panels on battens, existing boxes may need to be extended or repositioned.
The article mentions for electrical adjustment approximately €60–€150 per point, depending on the situation.
Not every room is suitable for MDF
Standard MDF panels are not a logical choice in areas where moisture is present for extended periods.
Think for example of a direct shower area or behind a cooking area where there is high heat and moisture exposure.
There, moisture-resistant boards, tilework or another suitable finish is usually wiser.
What do wall panels cost in 2026?
The price varies greatly depending on material and detailing.
According to the article, the indications including installation are approximately:
- MDF slats on felt: €120–€210/m²;
- profiled MDF panels / shaker style: €150–€280/m²;
- vertical MDF slats on battens: €140–€260/m²;
solid wood or oak wainscoting: €250–€450/m².
For paintable MDF, approximately €25–€55/m² may additionally be needed for edge primer, filling, sanding and two coats of lacquer.
Depending on the design, skirting boards, trim strips and electrical adjustments may also be added.
How long does installation take?
For a wall panel of approximately 10–12 m², the actual installation typically takes approximately 1–2 working days.
If electrics and battens still need to be adjusted, approximately half to a full day can be added. Painted panels then require additional time for filling, sanding, lacquering and curing.
The delivery time of the material is often longer than the installation itself and can according to the article vary from approximately one to six weeks.
Small details make the difference
Sealing a wide 1 cm gap with just caulk seems quick, but a thick caulk seam rarely looks good.
With larger connections, a suitable strip or profile is needed.
Sawn MDF edges also require extra preparation because they absorb paint much more strongly than the factory edge.
It is precisely these finishes that determine whether a wall looks like it was truly designed as part of the home after completion.
Having wall panels installed?
Would you like to have a TV wall, acoustic slat wall, shaker wall, wainscoting or other decorative wall finish made?
Send via AtaList:
- a photo of the entire wall;
- approximately width and height;
- photos of outlets and switches;
- any door frames or radiator;
- and an example of the style you want.
Also indicate whether the floor, plasterwork or electrics will be changed.
This way we can not only make the panels to measure, but also plan them at the right time within the complete renovation.
📧 Email: info@multiklussenbedrijf.nl
💬 WhatsApp: Send us a message
📝 Quote: Request a quote directly
Please log in to add a comment.
LoginNo comments yet. Be the first to comment!